If there are employee groups in your organization who do not have their own email addresses, you can still conduct the company survey using a code-based solution⭐.
This feature is available exclusively to customers with a GAIS Premium or Enterprise subscription.
Background for the code-based solution
GAIS is primarily designed to collect responses from employees via their individual email addresses. However, not everyone has a work email, and some organizations may not want a solution based on employees’ email addresses.
Most employees, however, have a mobile phone. Therefore, we developed a solution that allows data collection via a QR code unique to each employee. The codes are based on email addresses generated by the GAIS system.
Specifically, the unique codes are distributed to employees via intranet, printed labels, or similar methods.
Setting up the code-based solution
Name the link and enable the code solution
When creating your survey, go to the Participants tab. You need to do two things: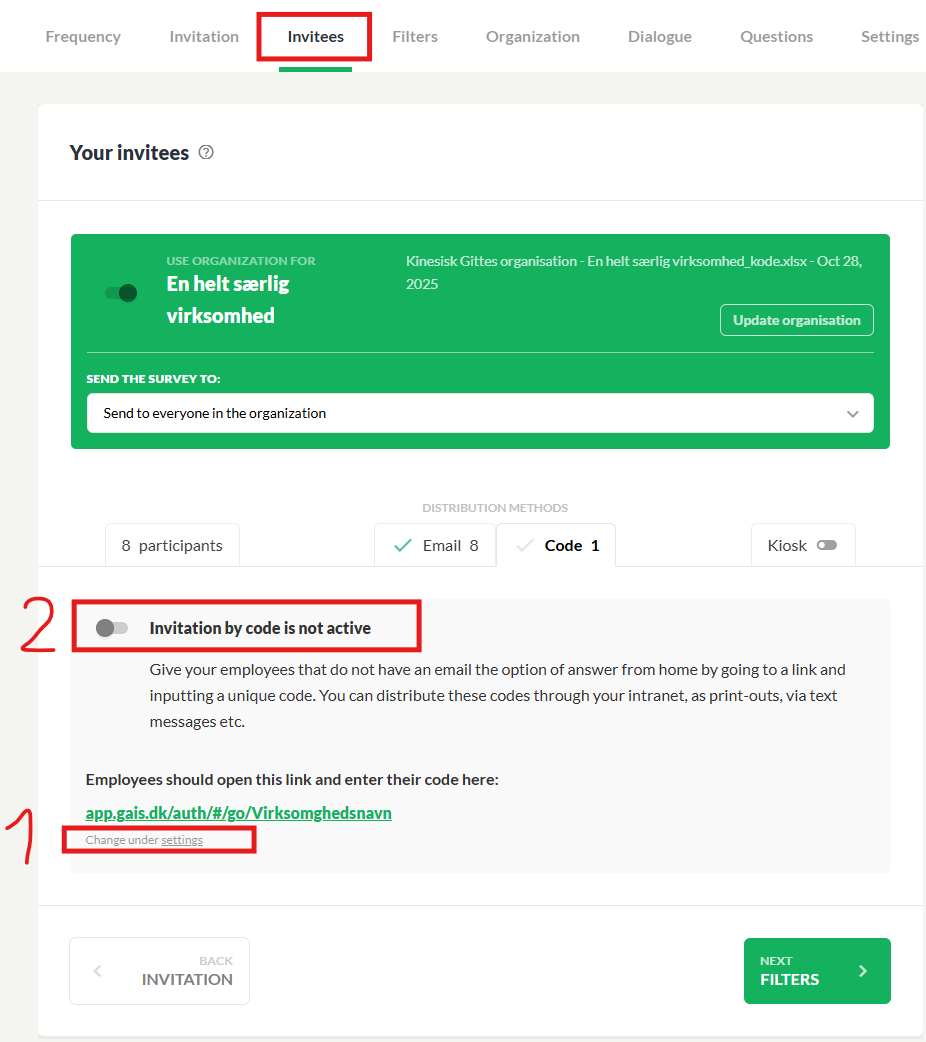
- Click Change name under settings. You will now access your company profile, where you enter a suitable name to include in the code—e.g., your company name. Confirm.
Note: The entered name cannot be changed later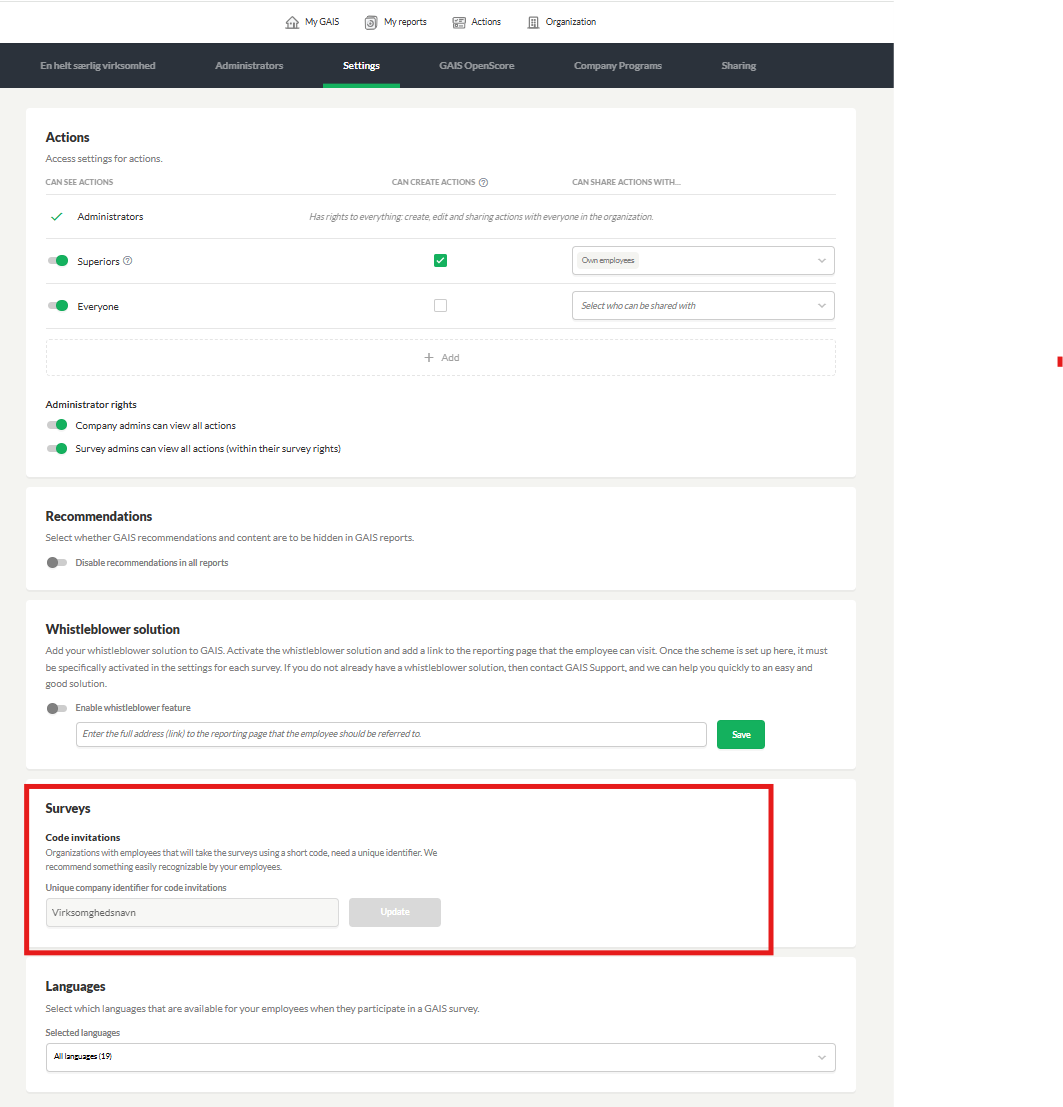
2. Return to the survey and activate code-based collection by toggling the switch to the right.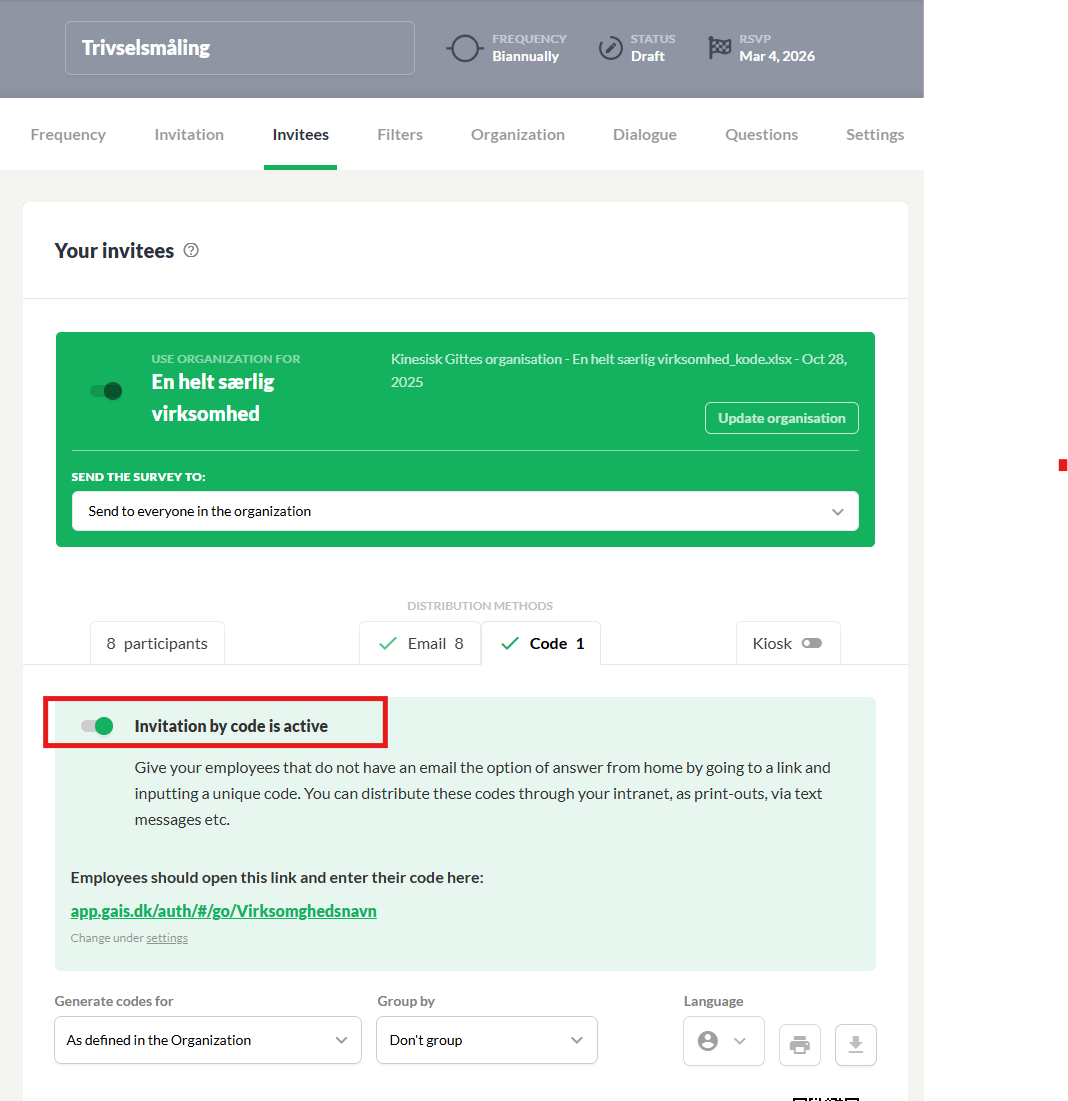
Generate codes for the right participants
- Define who should receive codes. You can choose between All or As defined in Organization.
If not all participants should take the survey via a QR code, select As defined in Organization.
- The organization’s data file determines who will receive an invitation via code. The data file must include a column specifying the distribution method for each employee.
- Since employees taking the survey via code do not have email addresses, temporary “dummy” email addresses must be generated. Your GAIS specialist can assist with this. The email addresses are used only to “attach the code”; individual responses cannot be traced back to these addresses.
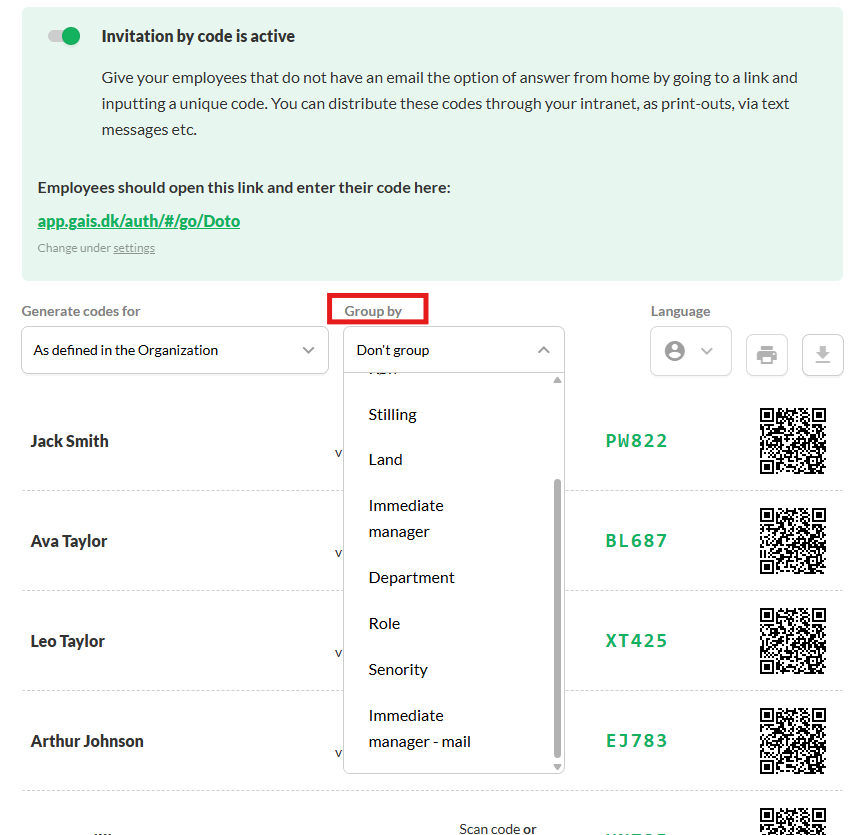
Define grouping
- Decide how codes should be grouped. You can use your various filters as grouping parameters.
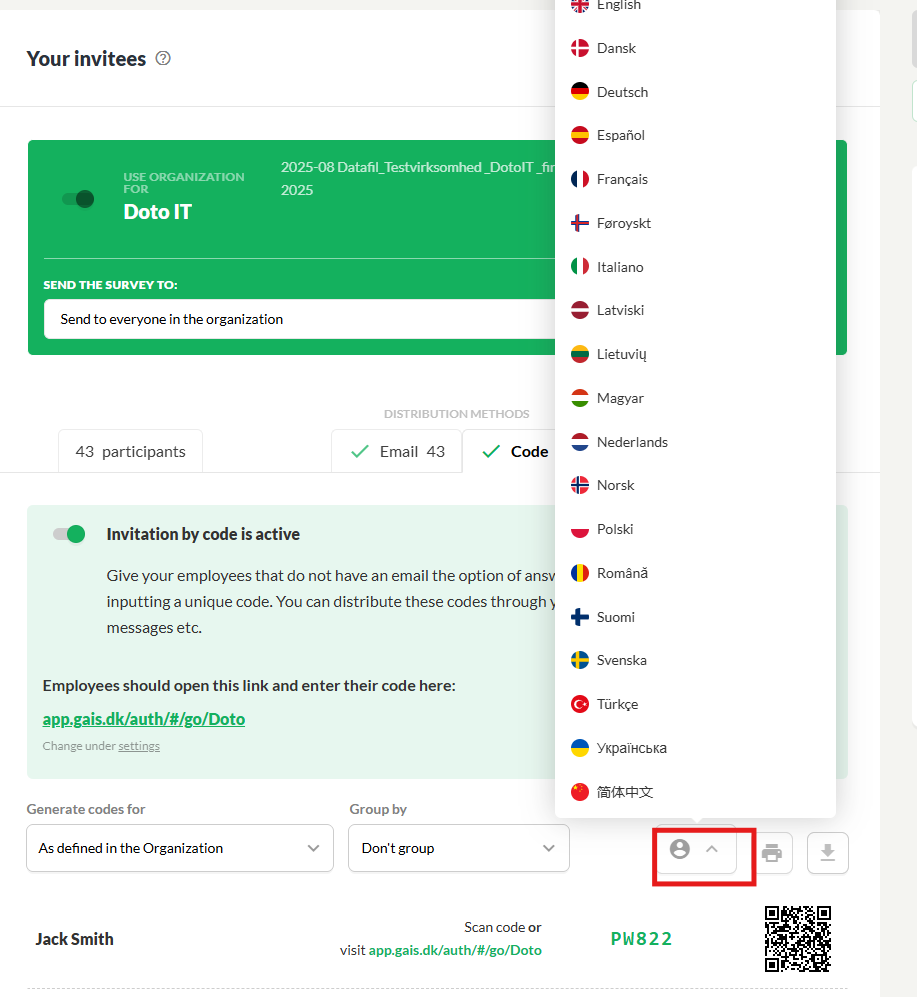
Select language
- Codes are displayed in the language specified for each participant in the data file. If you want to change all codes to a different language, you can do so here.
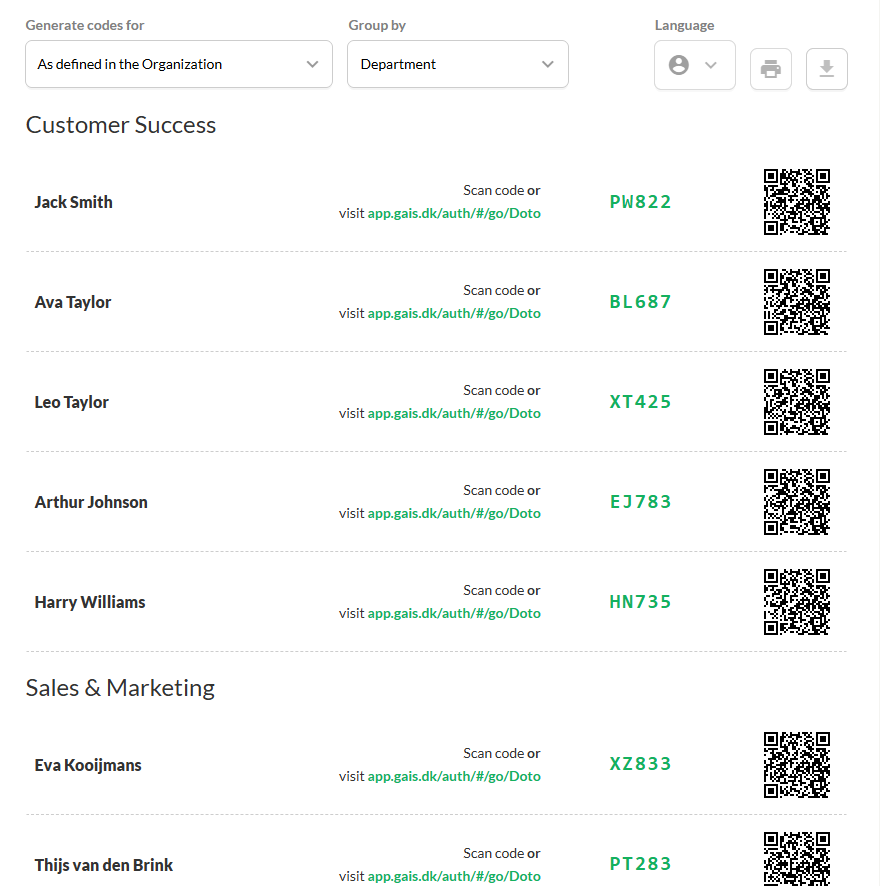
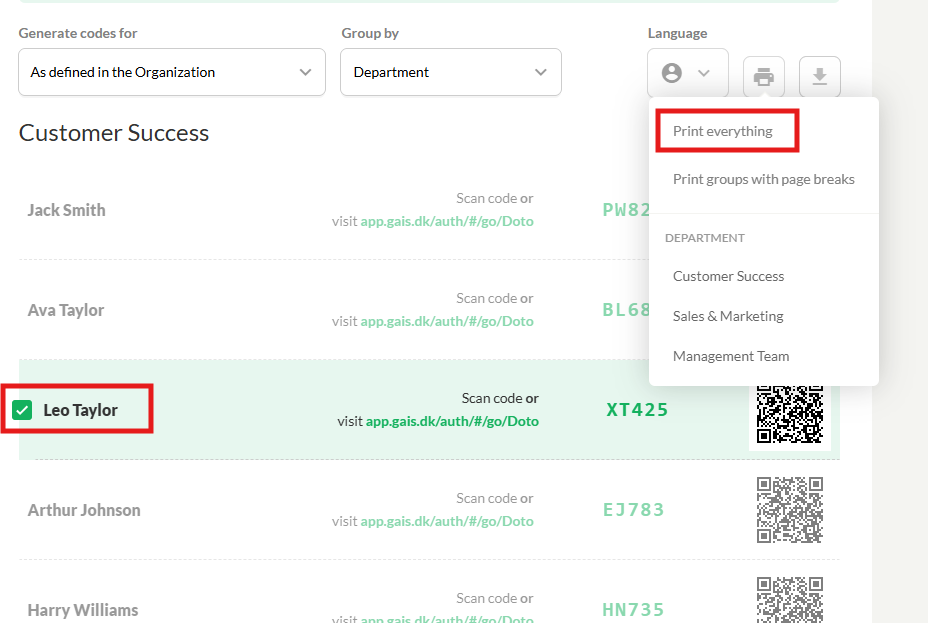
View the codes
- You can now see the unique codes generated for each employee who will respond via the code-based solution. Note that they are sorted according to the grouping you selected.
Distributing codes to participants
- Codes can be distributed in several ways, for example:
- Print them, cut them out, and hand them to participants personally.
- Take a picture of each code and send it to the respective employee.
Note: Each code is unique to the individual employee. The correct code must be used by the correct employee. Once saved, the employee can log in and out of their personal report. Therefore, the code must be kept for future access to the report.
Printing codes
- When printing, you can organize the codes as needed. For example, codes can be sorted by department.
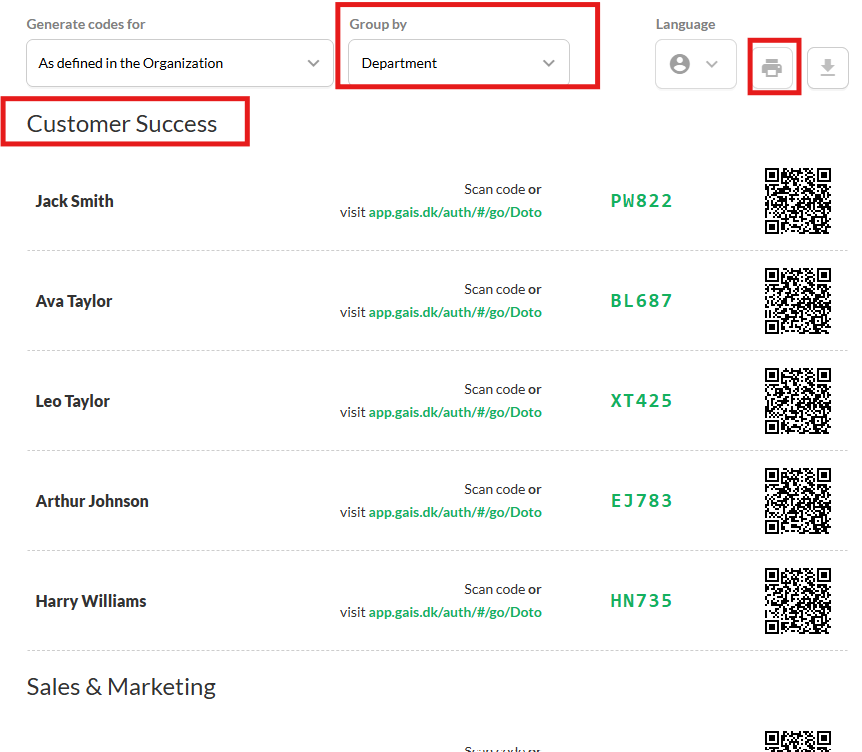
- In the print menu, you can choose to print all codes at once, insert page breaks between units, or print one or more selected units.
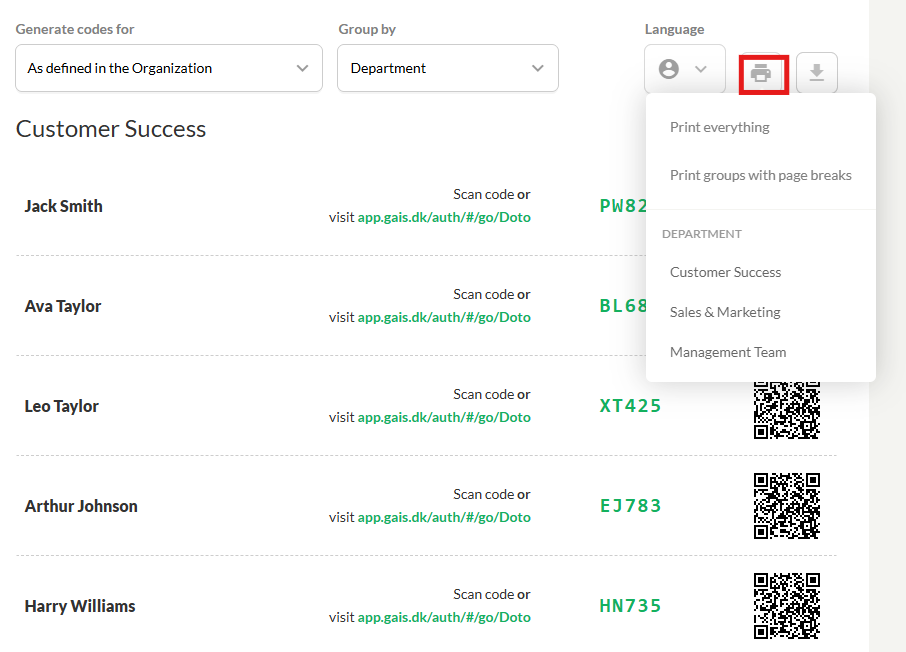
- You can also print specific codes by selecting them and clicking Print → Print all.
How employees complete the survey
- Each code is unique and can be used only once. When an employee receives their code, they can access the survey in one of two ways:
- Scan the QR code with their phone
- Open the link in a browser on their phone or computer
- This opens a link to the survey, which is completed in the same way as other collection methods.
Was this article helpful?
That’s Great!
Thank you for your feedback
Sorry! We couldn't be helpful
Thank you for your feedback
Feedback sent
We appreciate your effort and will try to fix the article